1. Create a Neon account
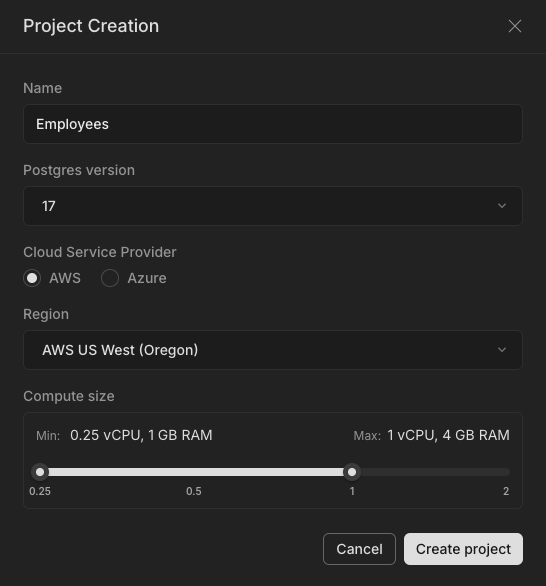
If you’re new to Neon, the first step is to sign up and create your initial project in Neon using the steps detailed in the section below.
2. Create a Neon database
Make sure your Neon database is deployed to the same AWS region as your RDS database (us-west-2).
After you have signed up for a Neon account, follow our getting started guide to create your initial project
You will be introduced to these key Neon terms:

- Project: The top-level container for your Neon databases—the logical equivalent to an “instance” in RDS.
- Branch: A versioned copy of your database environment. Each Neon project can have multiple branches, as we will see later.
- Database: The actual database instance where your data resides. In Neon, databases live inside branches.
Neon is built on an innovative branch-based architecture:
- The main branch will be your primary development branch, where you’ll load the data from your RDS database every night.
- Once everything is set up, you’ll be able to create additional branches from the main branch to duplicate your development environment in a second, without additional storage costs, as many times as you need.
- Every engineer on your team can have their own dev branch, facilitating parallel development without adding overheads in database management or costs.
🚨 Once you’ve set up your Neon account and your project, create a database in the main branch, and make a note of the connection string. You will need this in the next step.
Select Your Project -> Connection Details -> Connection String
- On the dashboard, you will see a list of your projects.
- Click on the project for which you want to find the connection string.
- In the left-hand menu, locate and click on “Connection Details” or “Connect” (this may vary slightly depending on the Neon Console’s version).
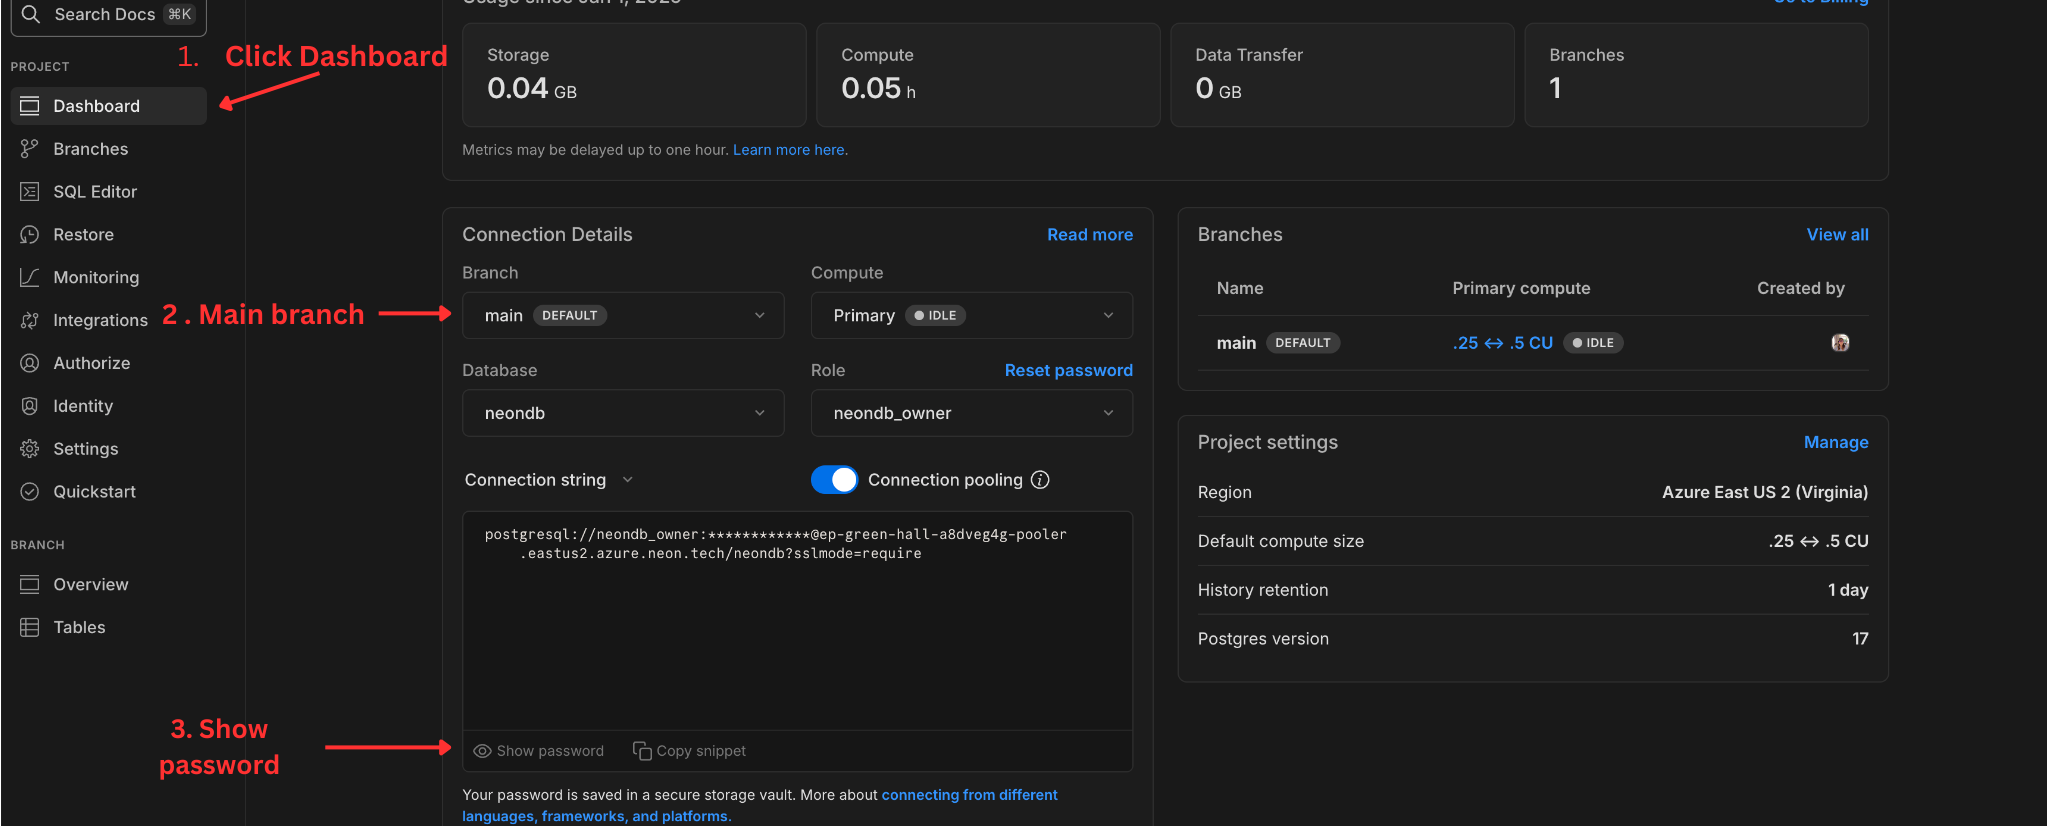
- In the Connection Details section, you will see the connection string displayed. Your connection string will be customized with your Neon credentials. Copy the connections string based on the frameworks you are using.
- View or Generate a Password
- If you need a password, look for a button to “Reveal Password” or “Reset Password” in the Connection Details section. Follow the prompts to view or reset it as needed.
3. Go back to the VsCode server and open the terminal.
Export the connection string as an environment variable to simplify future connections:
export DEV_DATABASE_URL="<your-connection-string>" >> ~/.bashrc
Then to add to apply your updates run:
source ~/.bashrc
Replace with the connection string from your main branch copied from the Neon Console.
Confirm that the environment variable is set:
echo $DEV_DATABASE_URL
You should see your connection string displayed.
You can now use the connection string to connect to your development database in Neon:
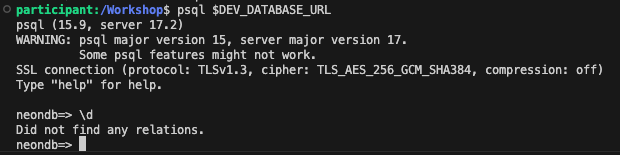
psql $DEV_DATABASE_URL
Or you can use the Neon Console to run queries and explore your database.
Note: This database currently has no table data so running this command below will return no schema/tables:
\d
However in the Github Actions section, we will automate the process to sync the RDS database with your Neon DB on a nightly scheduled occurrence.
To exit the Neon DB enter:
\q