Hands-On: Neon Branching Workflow
Neon Branching 🛠️
In this section, you’ll learn how to create, modify, and verify changes in a Neon feature database to experience the benefits of isolated development and testing.
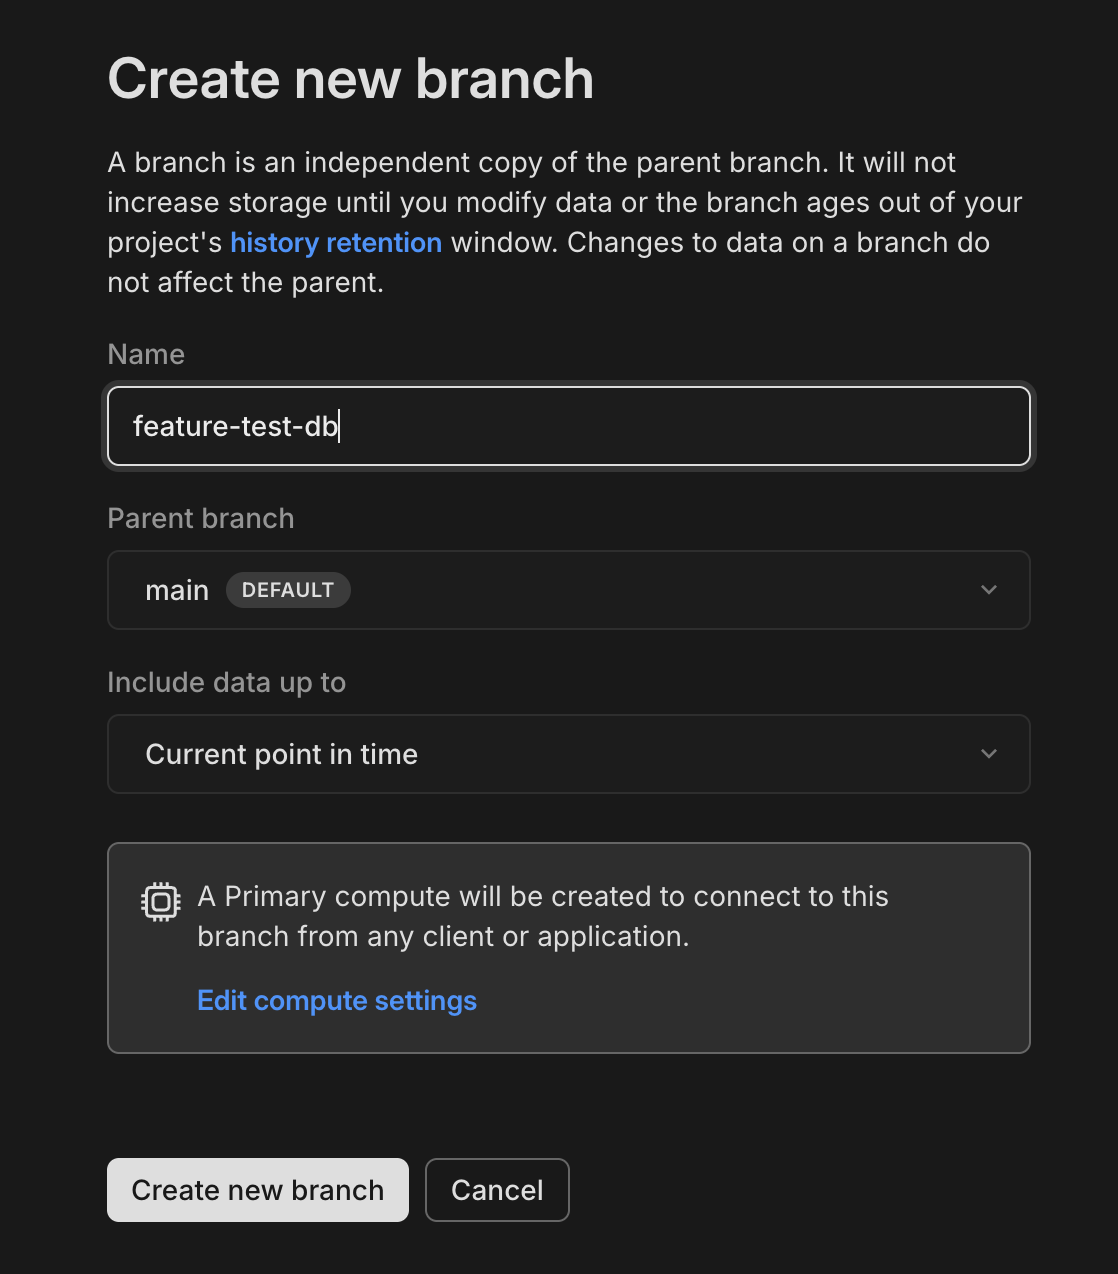
✅ Step 1: Create a Feature Database
Follow these steps to create a feature database in the Neon Console:
- Log in to the Neon Console.
- Navigate to your project and open the Branches tab.
- Click Create Branch.
- Name your branch (e.g.,
feature-test-db). - Select the main branch (Main Database) as the parent and click Create.
Result: You’ve created a new feature database with a full copy of the main branch’s data.
✅ Step 2: Connect to the Feature Database
- In the Branches tab, copy the connection string for your feature database.
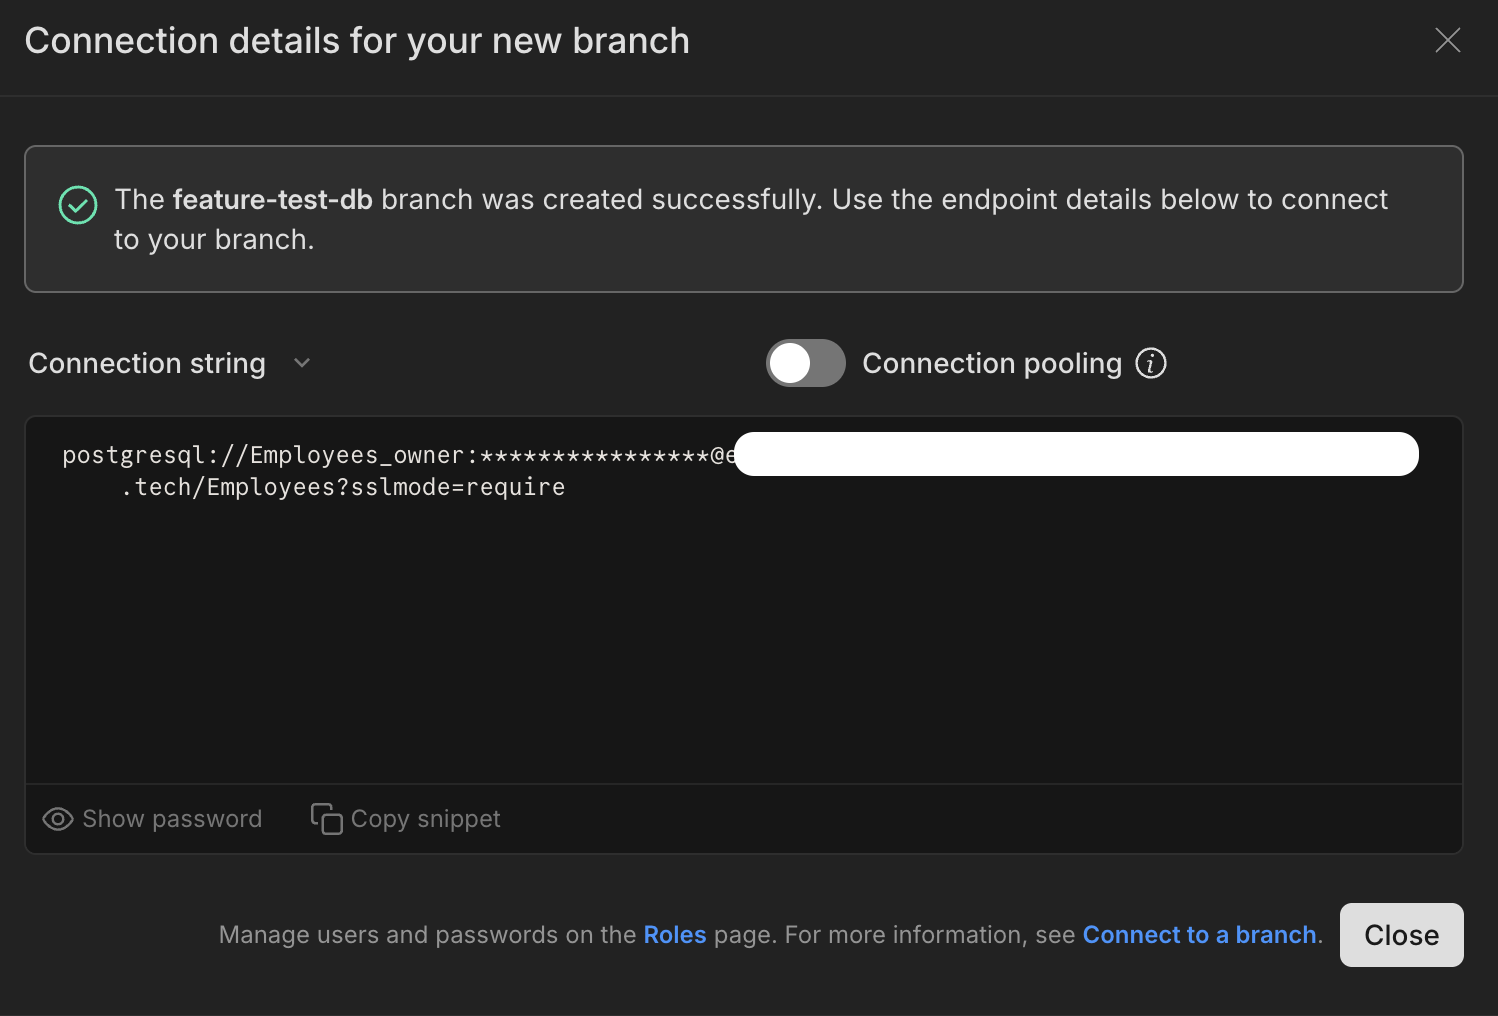
-
Go back to the server and open the terminal.
-
Export the connection string as an environment variable to simplify future connections:
export FEATURE_DATABASE_CONN="<your-connection-string>" >> ~/.bashrcReplace
<your-connection-string>with the connection string copied from the Neon Console.Then to add to apply your updates run:
source ~/.bashrc -
Confirm that the environment variable is set:
echo $FEATURE_DATABASE_CONNYou should see your connection string displayed.
-
Use the connection string to connect to the feature database:
psql $FEATURE_DATABASE_CONN -
Verify that the feature database’s data matches the main database:
SELECT * FROM employees.salary LIMIT 15;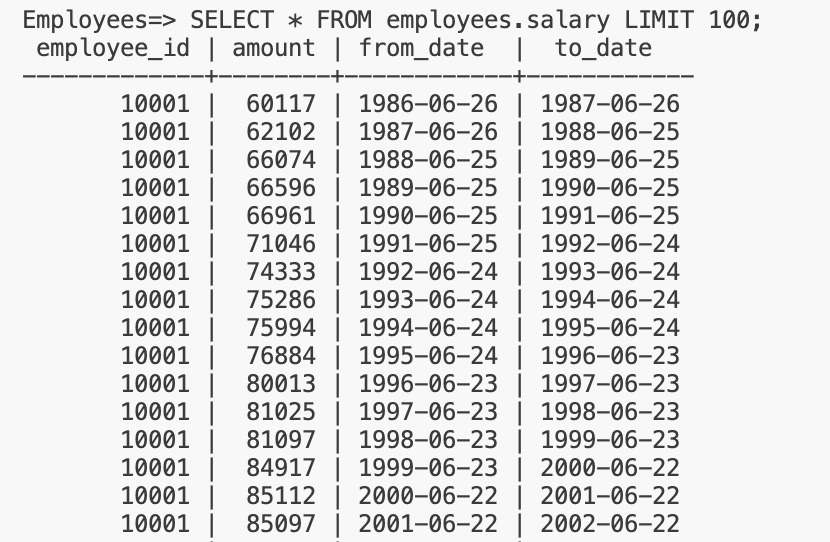
-
Exit the database:
\q
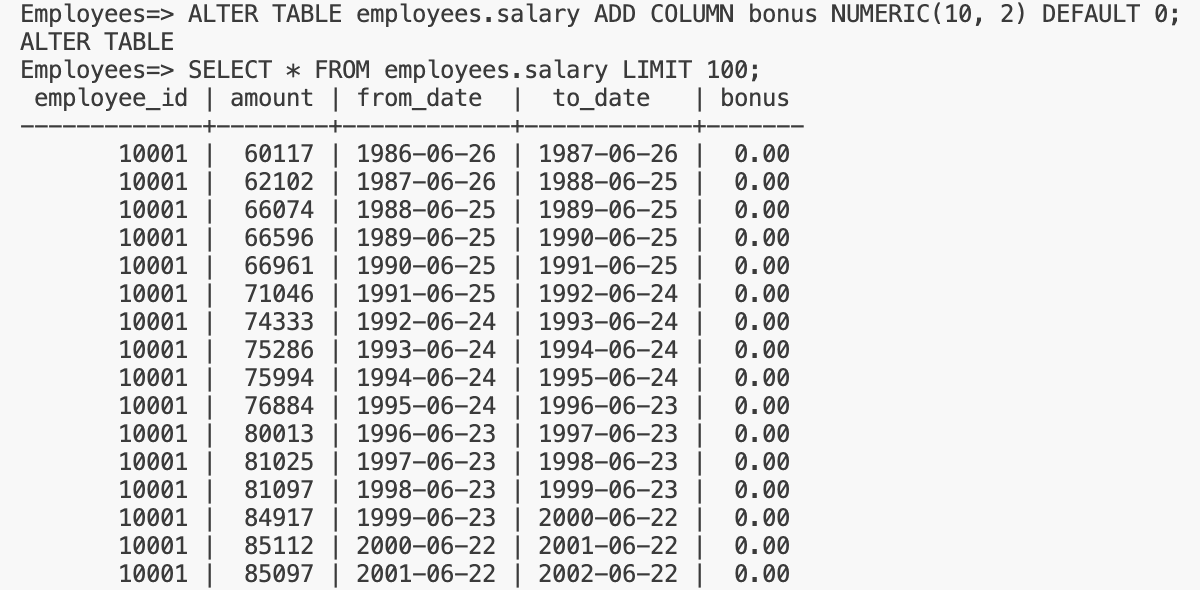
✅ Step 3: Apply Schema Changes to the Feature Database
Make schema changes in the feature database without affecting the main database.
Example:
ALTER TABLE employees.salary ADD COLUMN bonus NUMERIC(10, 2) DEFAULT 0;
Verify the change:
SELECT * FROM employees.salary LIMIT 15;
Confirm the bonus column is added.
✅ Step 4: Verify the Main Database Is Unaffected
The connection string for the main database is already saved as an environment variable (DEV_DATABASE_URL). Use this variable to connect back to the main database:
-
Connect to the main database using the environment variable:
psql $DEV_DATABASE_URL -
Check the schema:
SELECT column_name FROM information_schema.columns WHERE table_name = 'salary'; -
Confirm Main Neon Database is unaffected:
SELECT * FROM employees.salary LIMIT 15;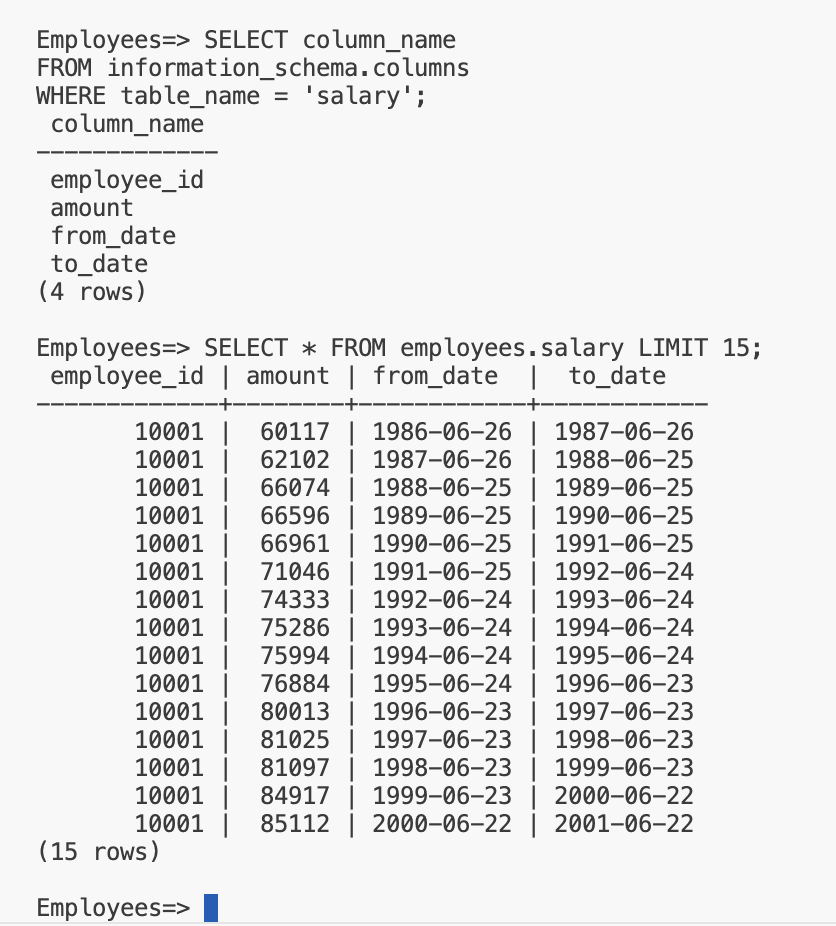
Result: The
bonuscolumn will not appear in the main database. -
Exit the database:
\q
✅ Step 5: Clean Up the Feature Database
Once testing is complete, delete the feature database:
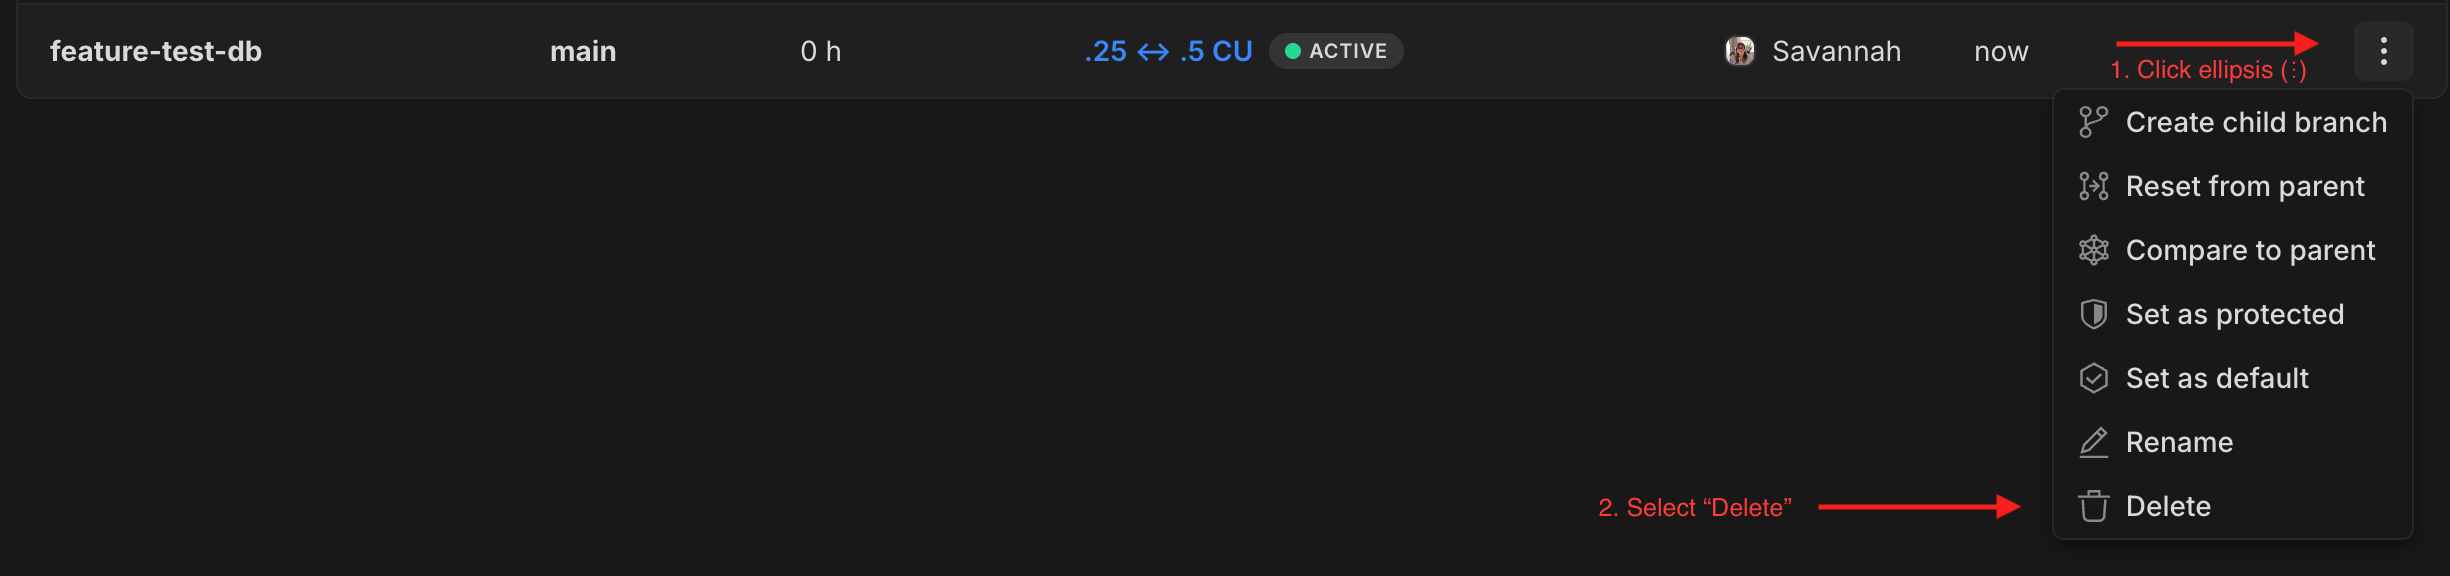
- In the Neon Console, go to the Branches tab.
- Find your feature database (e.g.,
feature-test-db). - Click the ellipsis (⋮) next to the branch and select Delete.
Alternatively, you can delete the feature database programmatically using the Neon API:
curl -X DELETE https://console.neon.tech/api/v2/projects/<project-id>/branches/<branch-id> \
-H "Authorization: Bearer <api-key>"
🏁 Summary 🏁
With Neon’s branching feature, you’ve:
- Created a new feature database for isolated testing.
- Exported the connection string as an environment variable for easier access.
- Applied schema changes without impacting the main database.
- Verified database independence through testing.
- Cleaned up the feature database after completing your tests.
👉 Use these steps to streamline your dev/test workflows while maintaining safety and efficiency!