Setting up OIDC Authentication for GitHub Actions
In this section, we’ll set up OIDC authentication between GitHub Actions and AWS using a CloudFormation template.
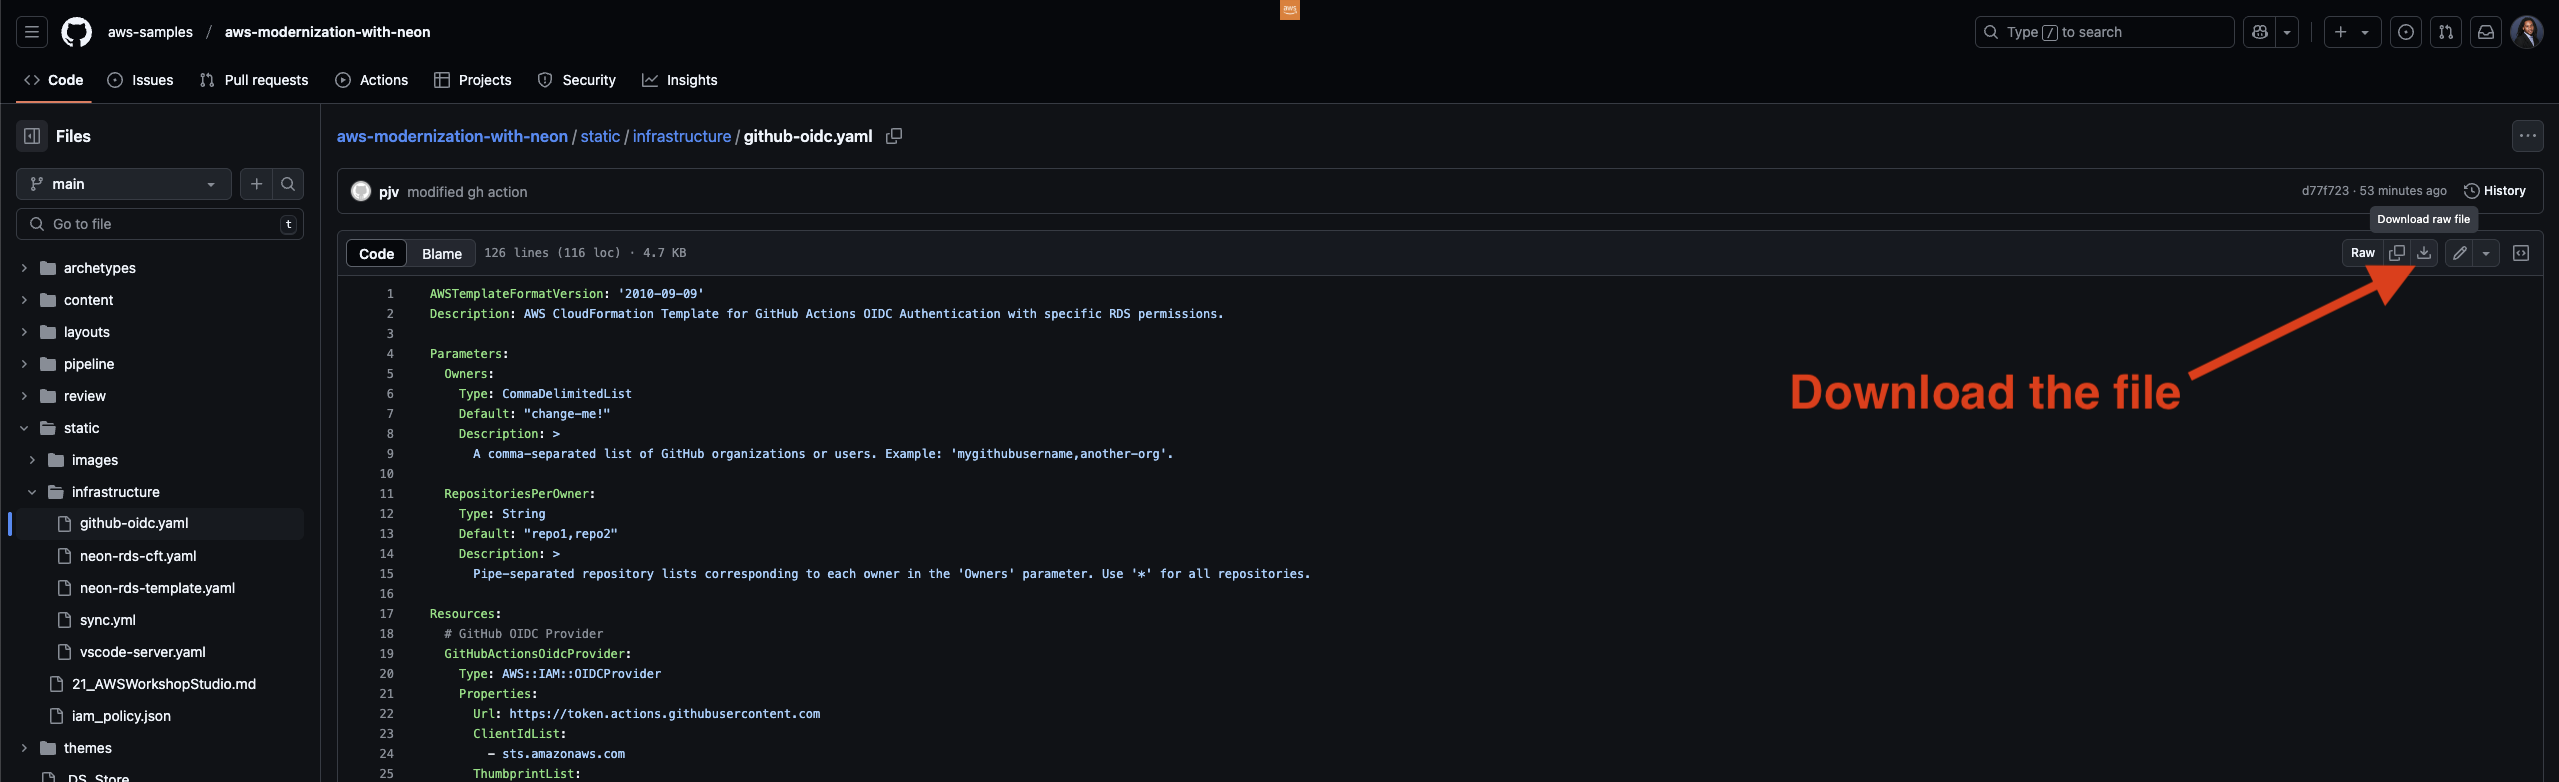
🔑 Getting the Template
-
Download the CloudFormation template from our GitHub repository:
- Download to your local machine
:button[Download GitHub OIDC Template]{href=":assetUrl{path=’/infrastructure/github-oidc.yaml’}" action=“download”}
🚀 Deploying the Template
:::alert{header=“Important” type=“warning”}
-
If you are in an AWS Event, click here to access the provisioned AWS Account. If you are working on this in your own AWS Account, please ignore this message. :::
-
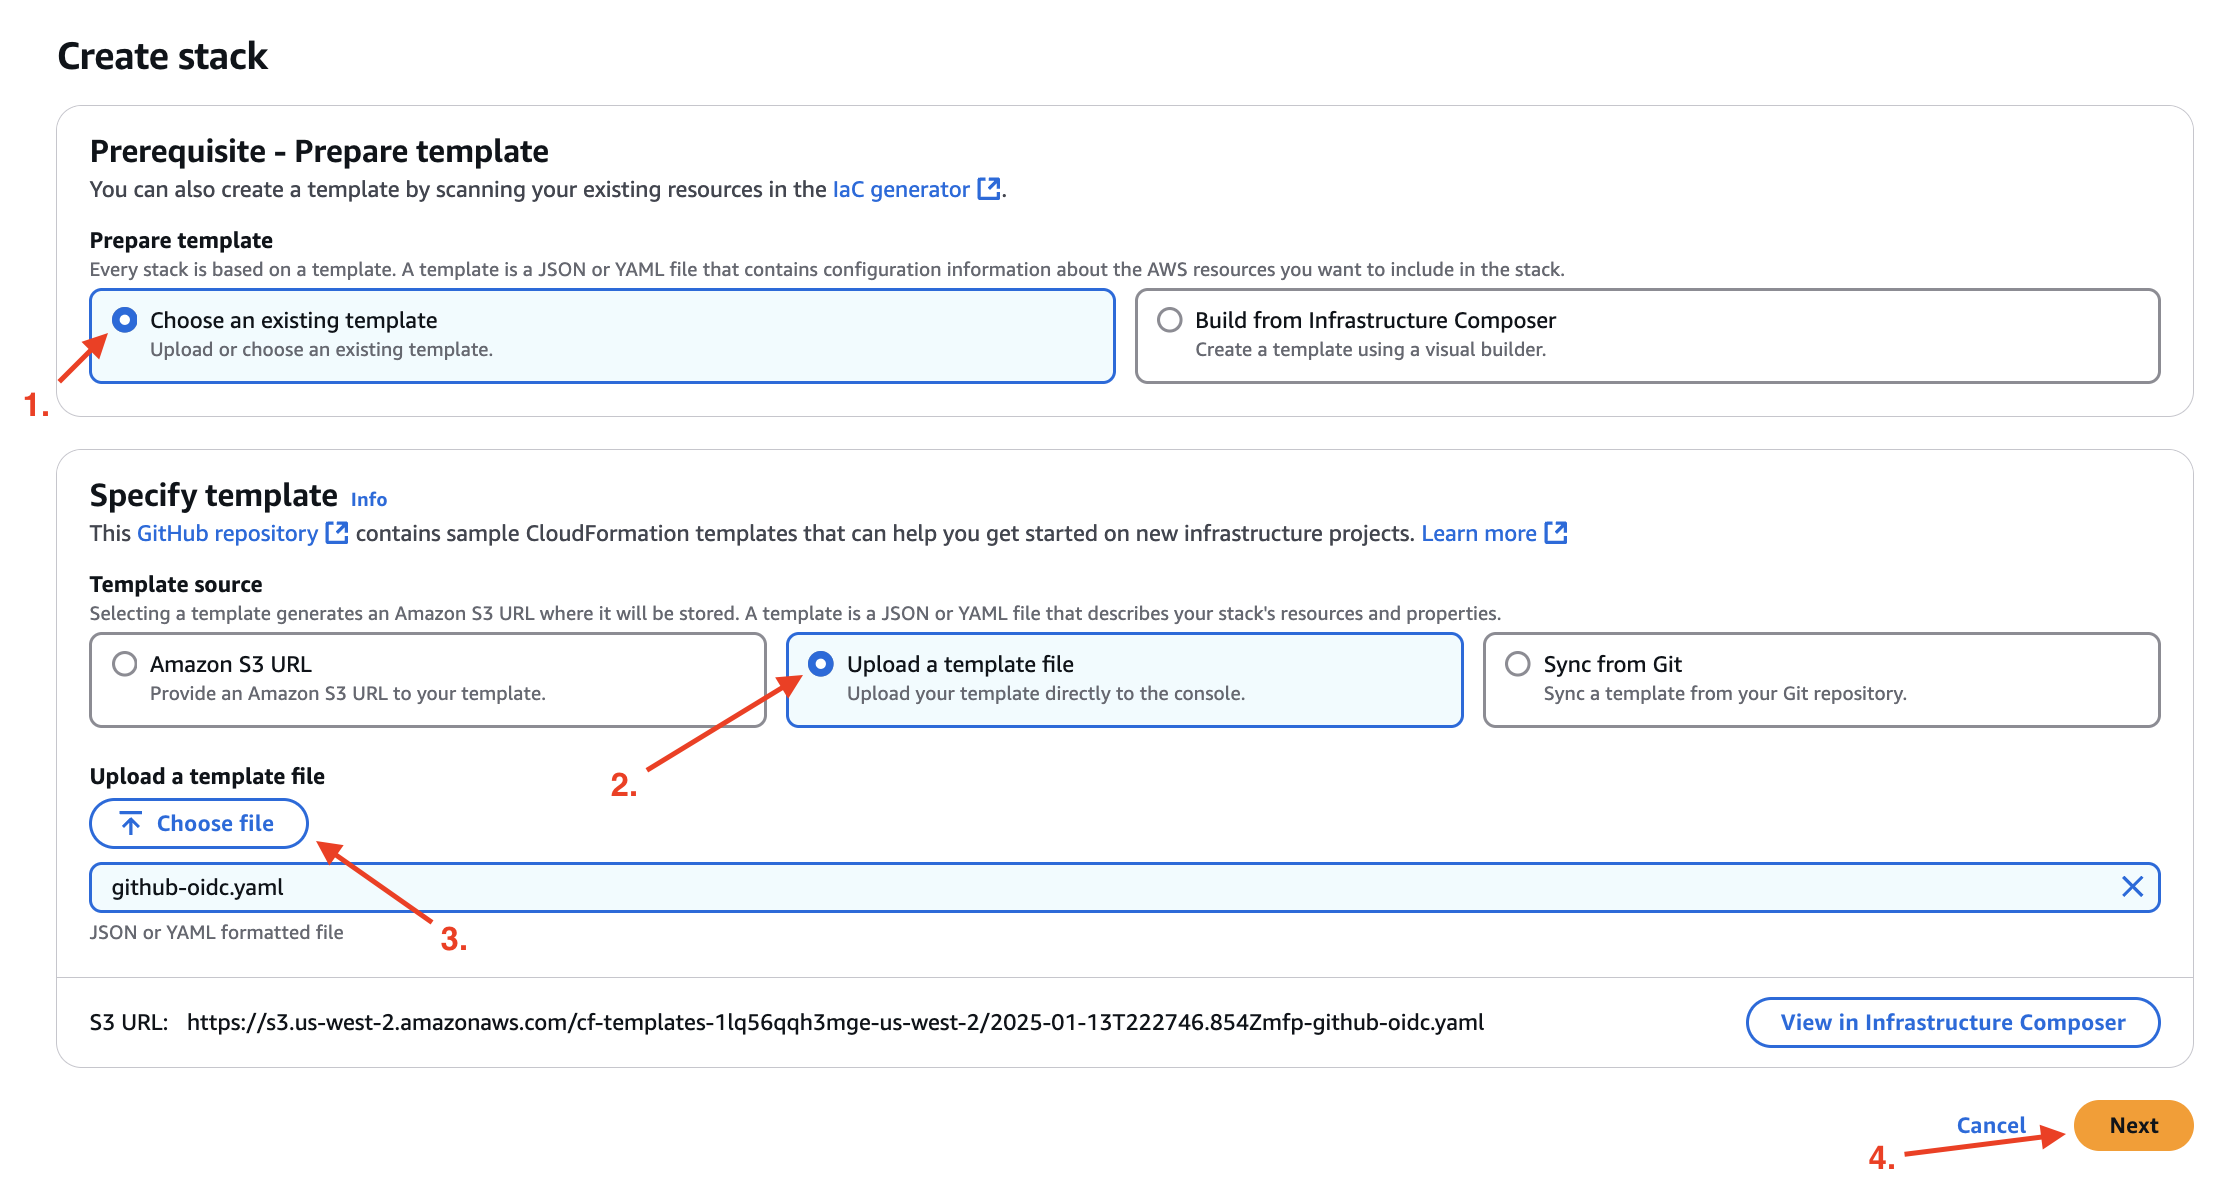
Open the AWS CloudFormation Console
-
Click “Create stack” → “With new resources (standard)”
-
Under “Specify template”:
-
Select “Upload a template file”
-
Click “Choose file”
-
Select the
github-oidc.yamlyou downloaded -
Click “Next”
-
https://catalog.us-east-1.prod.workshops.aws/event/account-login
-
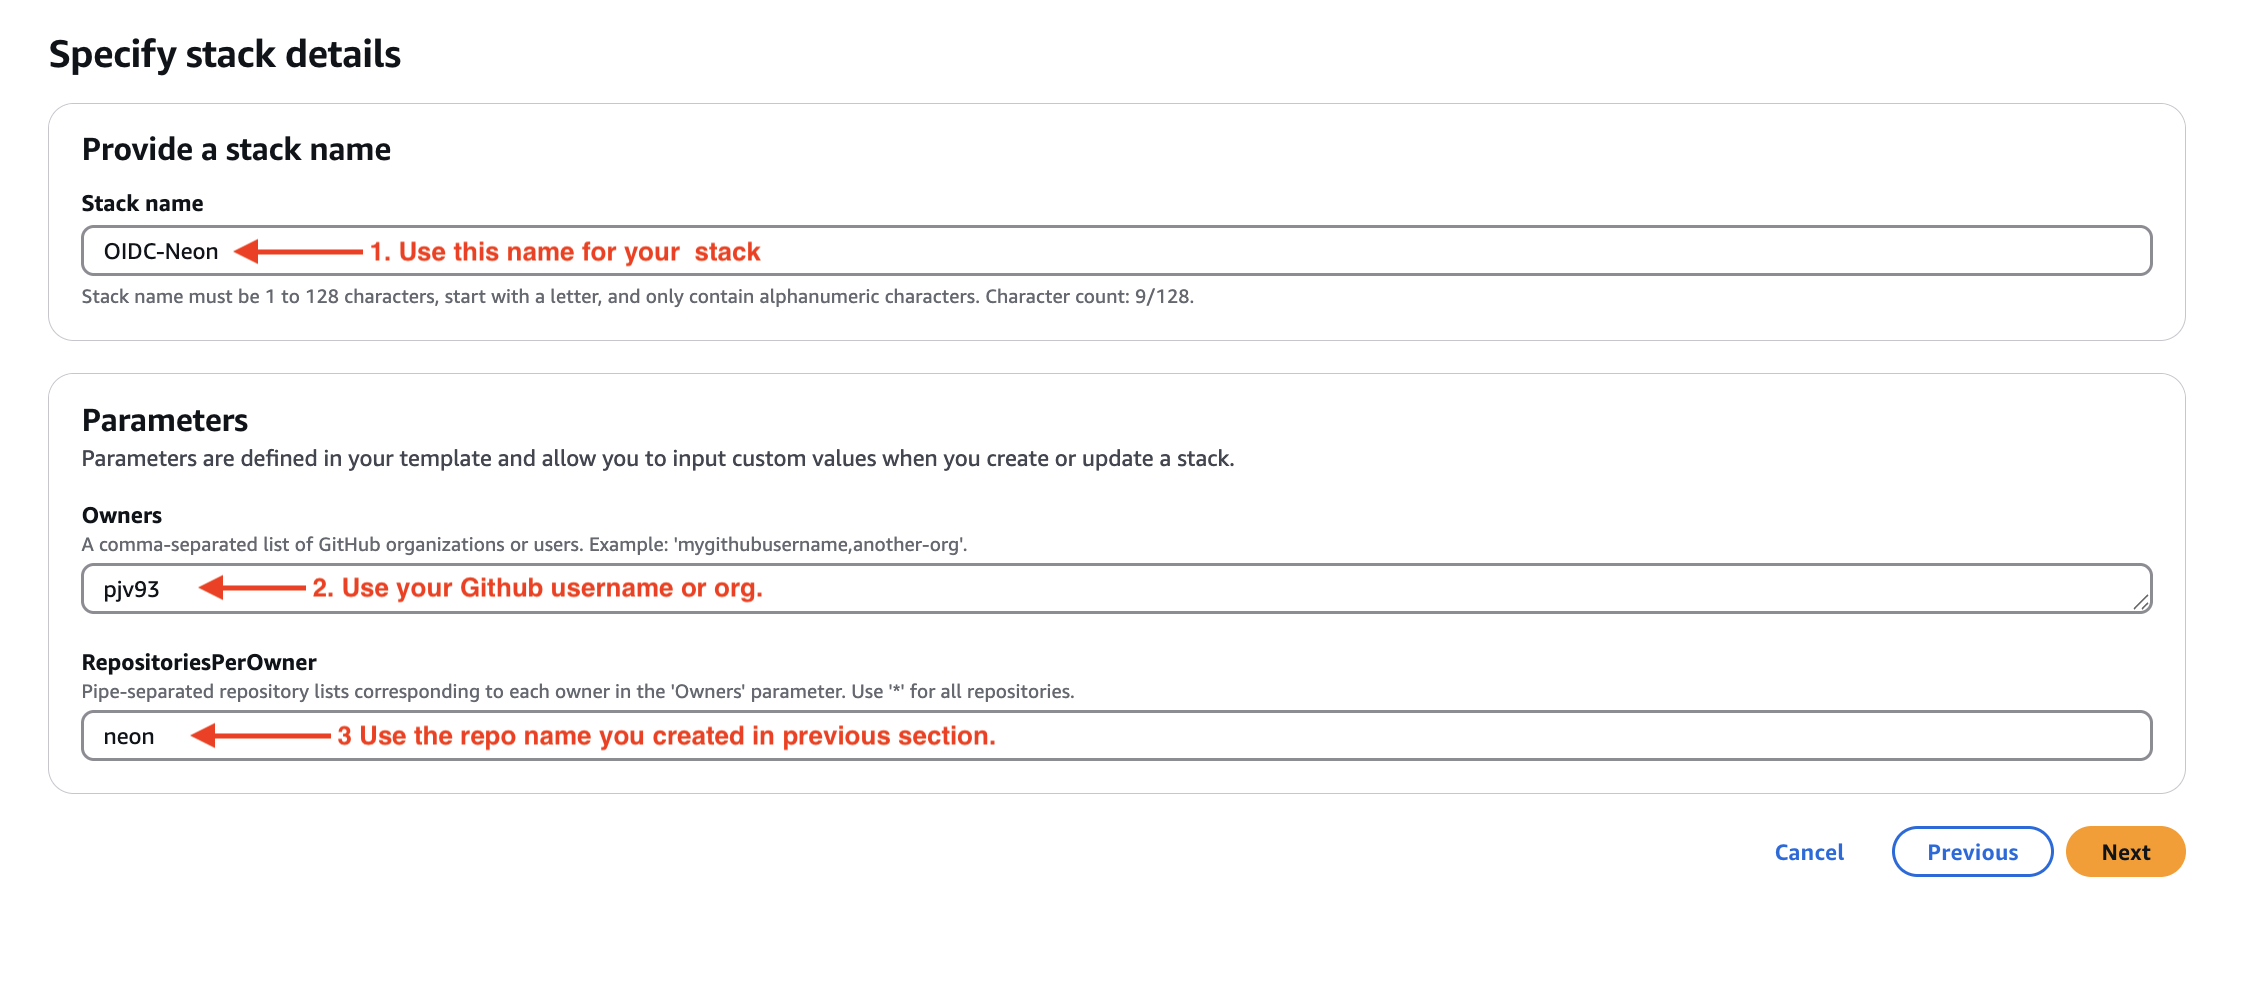
📝 Stack Configuration
- Enter stack details:
- Stack name:
github-oidc-stack - Owners: Your GitHub username —> This is CASE-SENSITIVE
- RepositoriesPerOwner: Your repository name (or
*for all repositories)
- Stack name:
- Click “Next” through the stack options
- Review and click “Create stack”
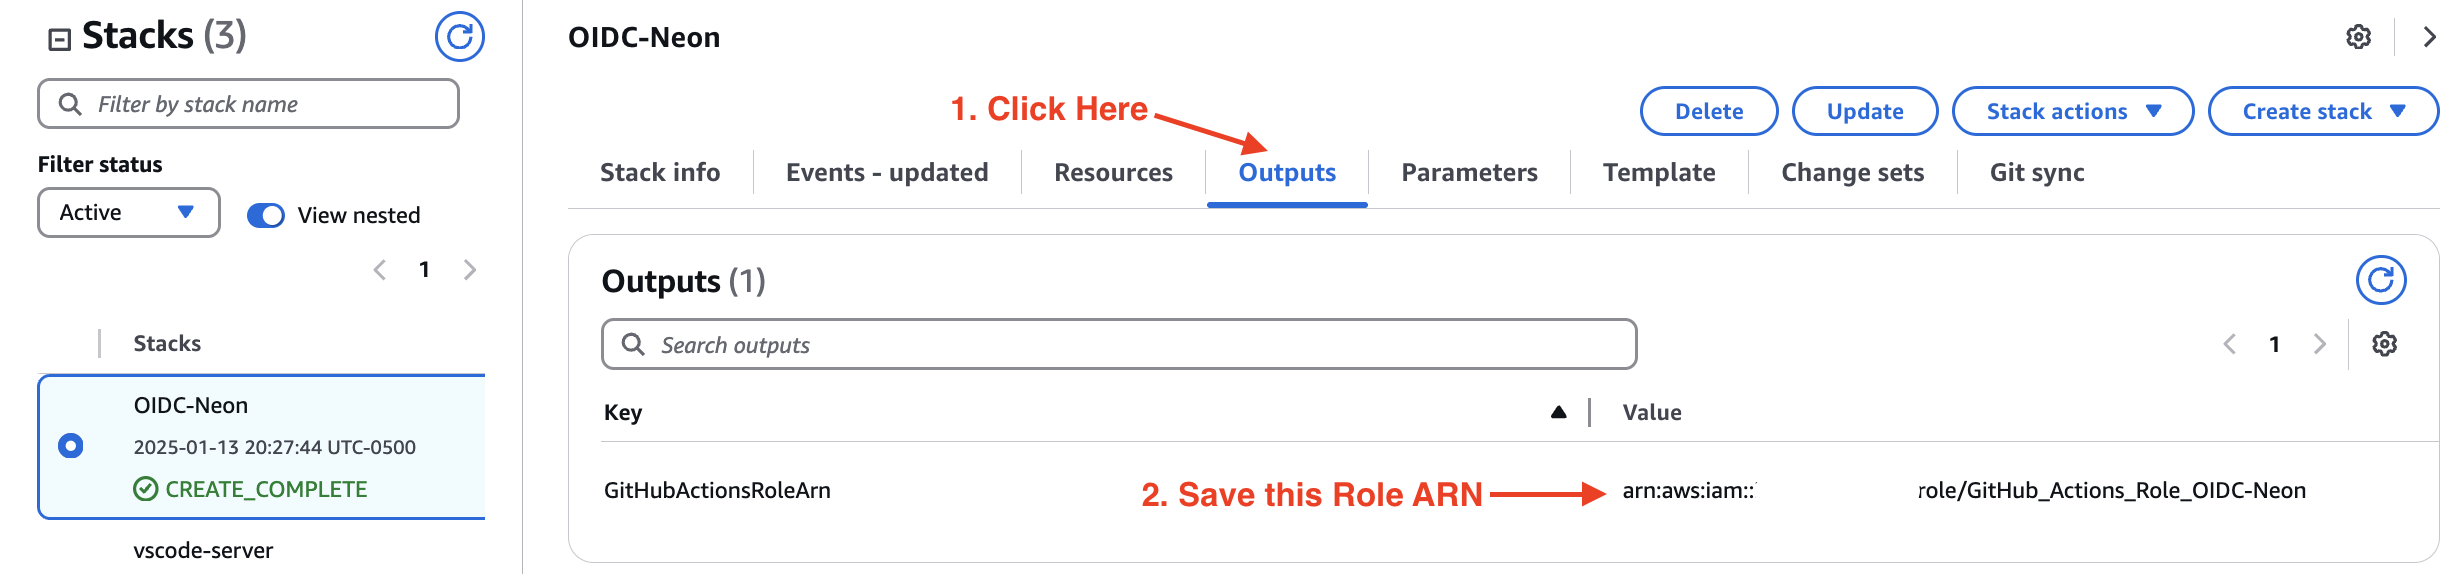
✅ Getting Your Role ARN
Once the stack creation is complete:
- Go to the “Outputs” tab in CloudFormation
- Find the “GitHubActionsRoleArn”
- Copy this value - we’ll use it in our next steps!
🎯 Next Steps
Once you have your Role ARN, proceed to the next section where we’ll set up our GitHub Secrets.
🔧 Troubleshooting
If your stack fails to create:
- Check the “Events” tab for error messages
- Verify your GitHub username is correct
- Ensure you have sufficient AWS permissions